
ECA: Easy Messaging App — Basic Setup Guide
Welcome to ECA: Easy Messaging App! Follow these steps to get up and running with SMS & Email campaigns quickly.
1. Install & Open the App
- Install ECA: Easy Messaging App from the Shopify App Store
- Open the app from your Shopify Admin
- You’ll land on the Dashboard
2. Connect Your Email Provider (SMTP Setup)
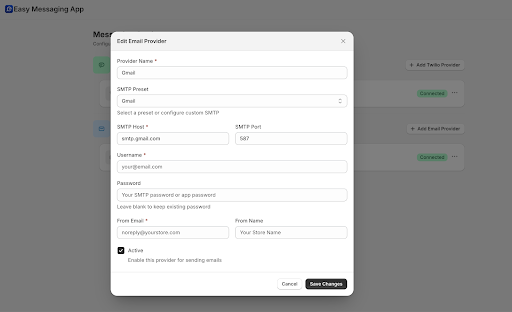
To send emails, you must connect your SMTP provider.
Steps:
- Go to Settings → SMTP
- Enter your SMTP details:
- SMTP Host (e.g., smtp.gmail.com, smtp.sendgrid.net)
- Port (usually 587 or 465)
- Username (your email or API user)
- Password / API Key
- Sender Email (e.g., support@yourstore.com)
- Click Save & Test Connection
Once verified, your Email campaigns are ready to send.
Popular SMTP providers:
Gmail, Outlook, SendGrid, Mailgun, Amazon SES
3. Connect Your SMS Provider
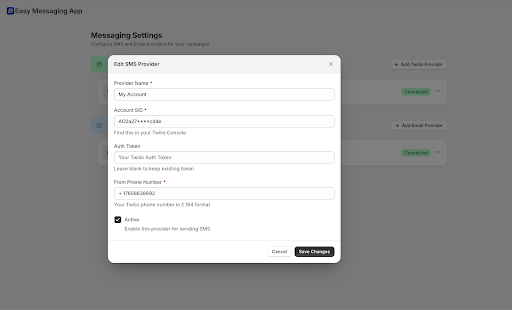
To send SMS campaigns, you need to connect an SMS gateway provider.
Steps:
- Go to Settings → SMS
- Select your SMS provider (e.g., Twilio, MSG91, or custom provider)
- Enter required details such as:
- API Key
- API Secret
- Sender ID
- Phone number (if applicable)
- Click Save & Test
Your SMS channel is now active.
If you don’t have a provider yet, our team can recommend the best option for your region.
4. Create Your First Template (AI-Powered)
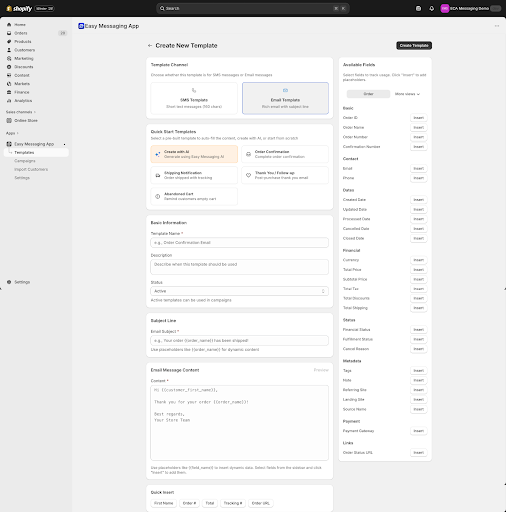
- Go to Templates
- Click Create New Template
- Choose:
- SMS or Email
- Use:
- AI Generate (recommended)
- Or write your own content
- Use dynamic variables like:
{{Customer_Name}}{{Order_Number}}{{Next_Delivery_Date}}
- Click Save
5. Create Your First Campaign
- Go to Campaigns → New Campaign
- Select:
- SMS or Email
- Choose your template
- Apply filters (e.g., order status, product, customer tags)
- Preview recipients
- Choose:
- Start Campaign
- Or Schedule for later
6. Track Performance
Go to Dashboard → Analytics to view:
- Messages sent
- Delivered / Failed
- Campaign history
- Engagement performance
7. Need Help? We’re Here
You can always book a setup call with our team: 👉 Schedule Support Session