
Easy B2B Wholesale App – Creating Wholesale Pricing
Easily set up wholesale pricing for your store using the Easy B2B Wholesale app. Follow these steps to create pricing plans, configure discounts, and target specific customers or markets.
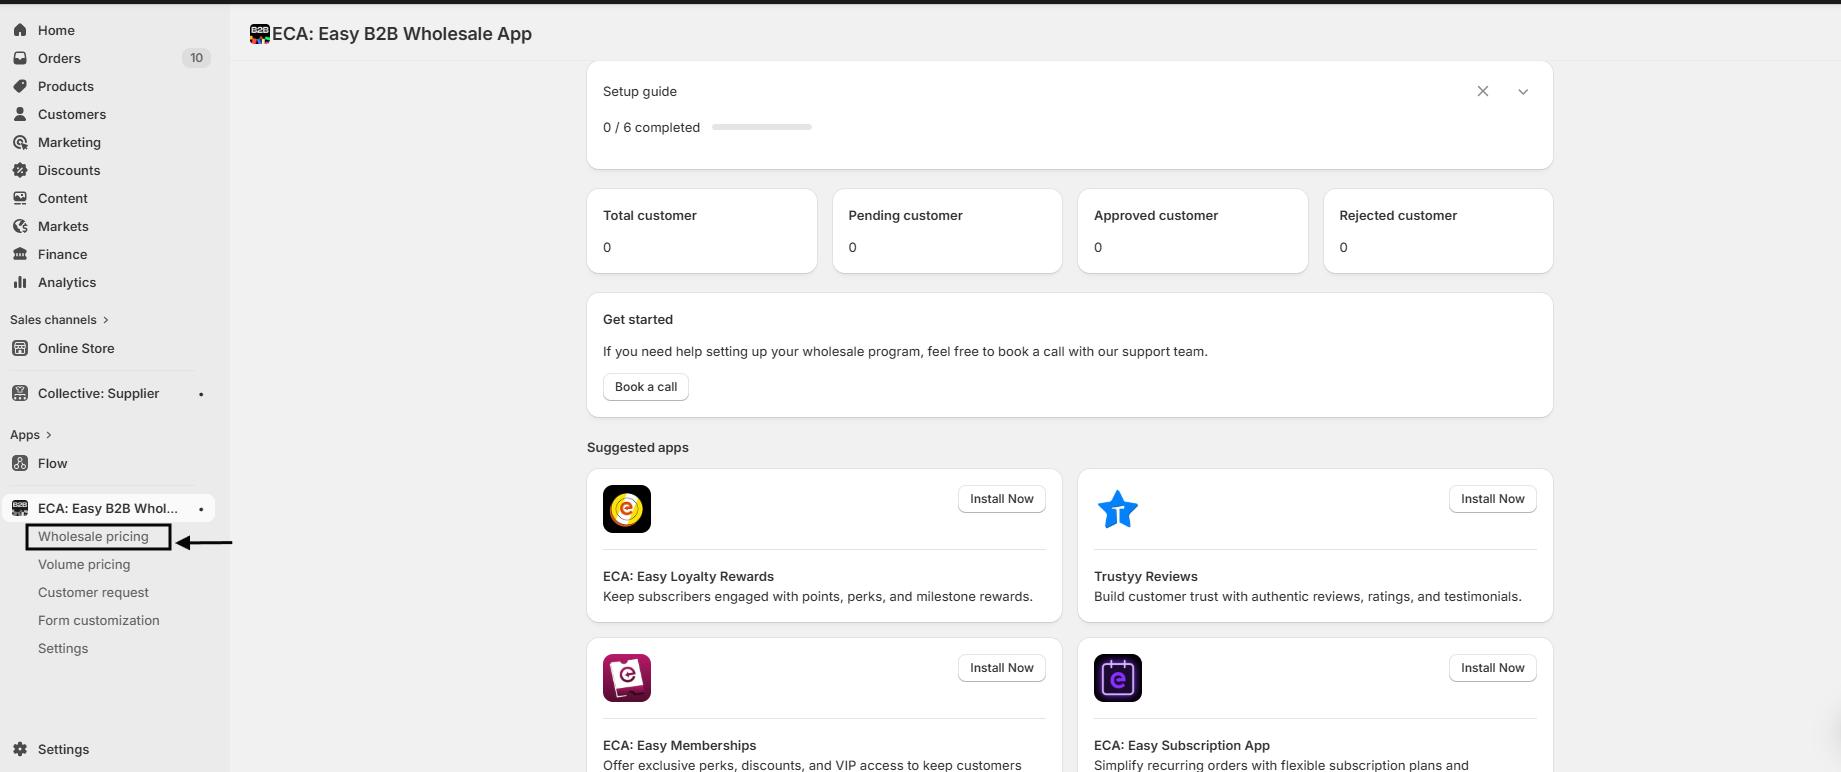
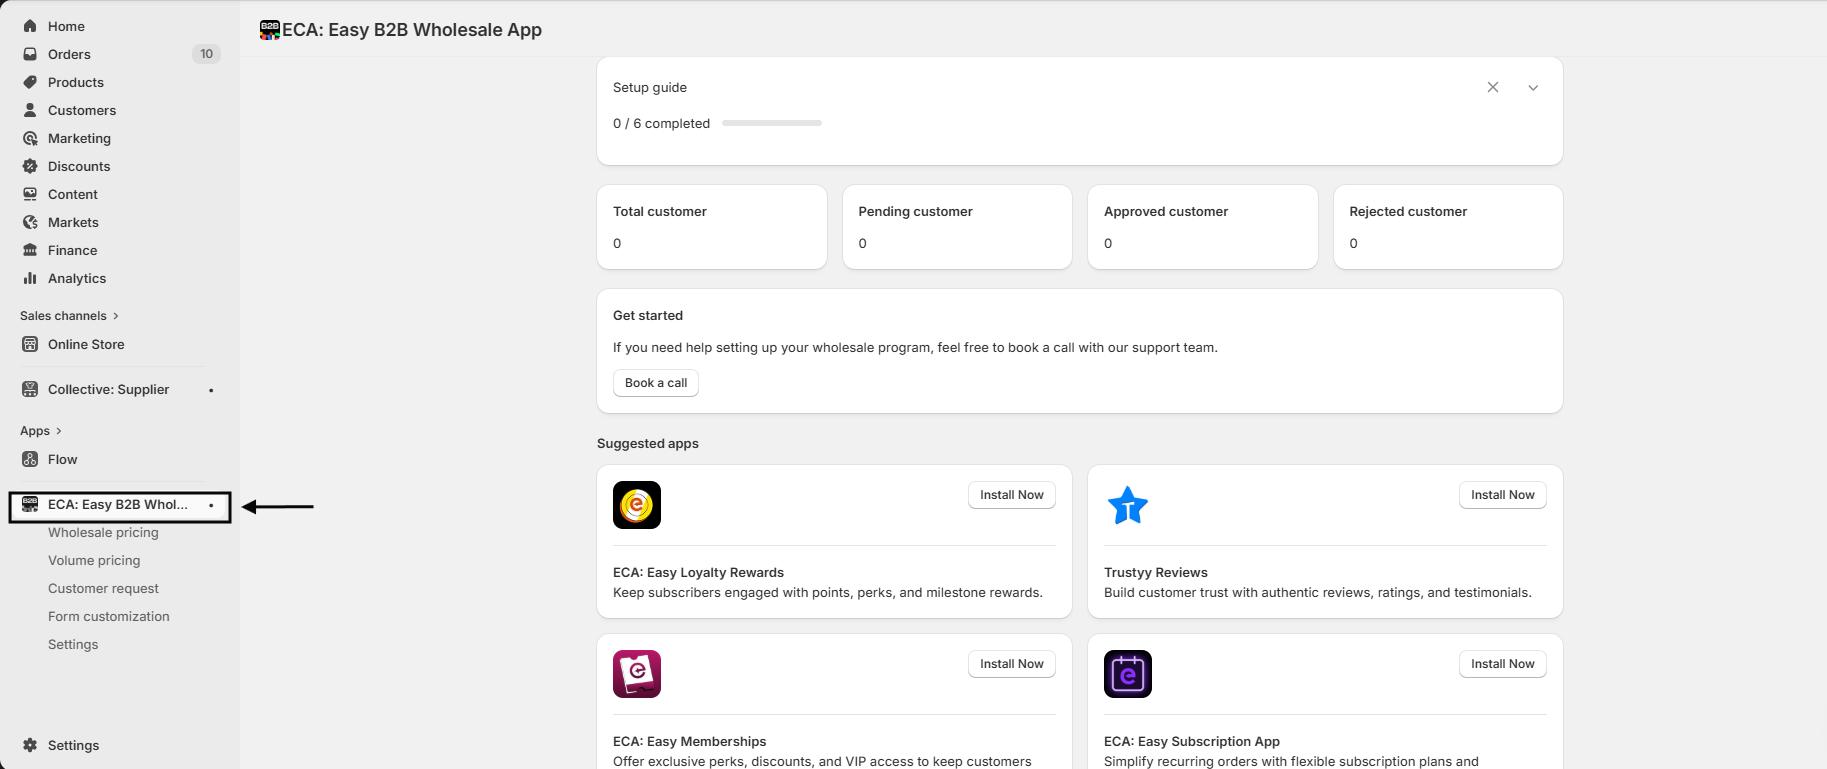
Step 1: Access the App
- From your Shopify dashboard, go to the Apps section.
- Click on ECA: B2B Wholesale to open the app.

Step 2: Navigate to Wholesale Pricing
- In the app’s navigation menu, locate Wholesale Pricing.
- Click on it to view your existing pricing plans and options.
Step 3: Create a New Wholesale Pricing Plan
- Click the Create New Wholesale Pricing button.
- Enter a Pricing Plan Name (up to 50 characters).
- Example: “VIP Customers Discount”
- The plan will automatically start in Draft status.

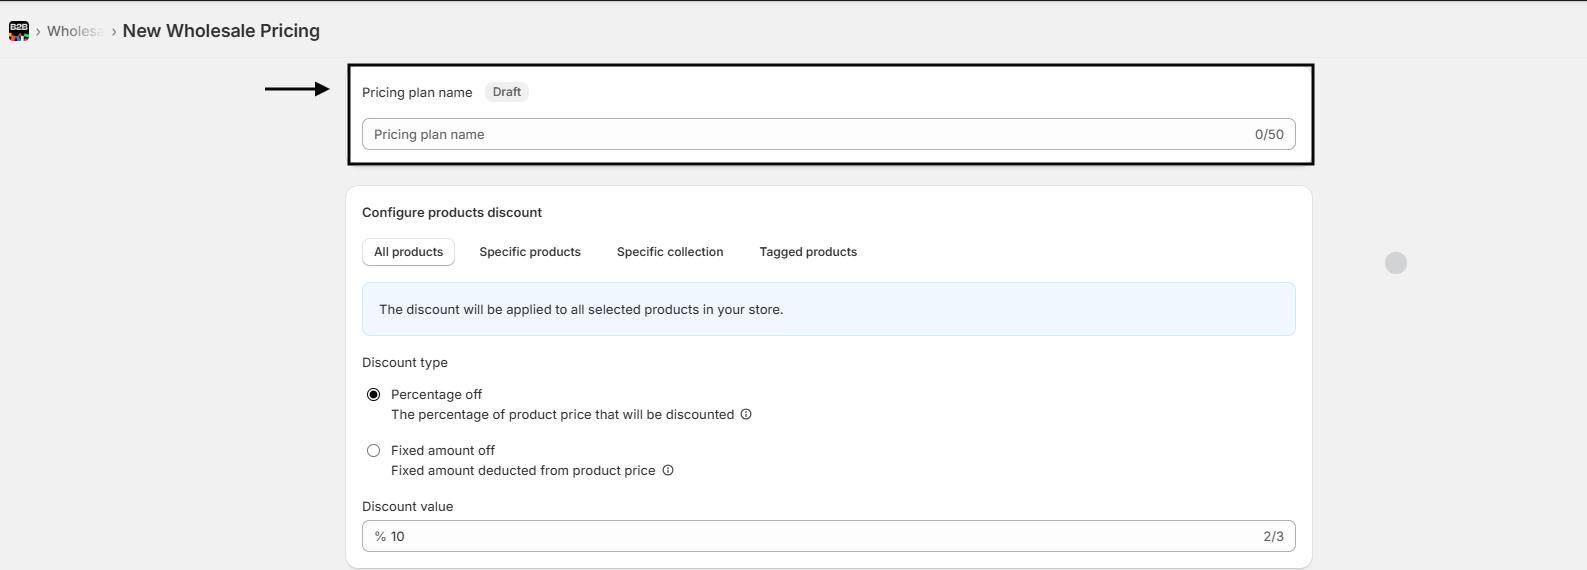
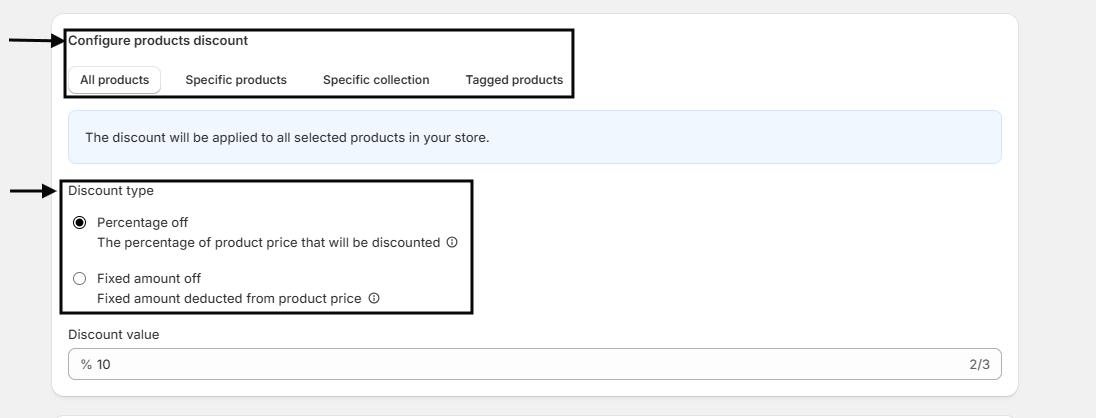
Step 4: Configure Product Discounts
- Decide how the discount should be applied:
- Percentage Off – Reduces the product price by a percentage.
- Fixed Amount Off – Deducts a fixed amount from the product price.
- Enter the Discount Value (e.g., 10% or $5).
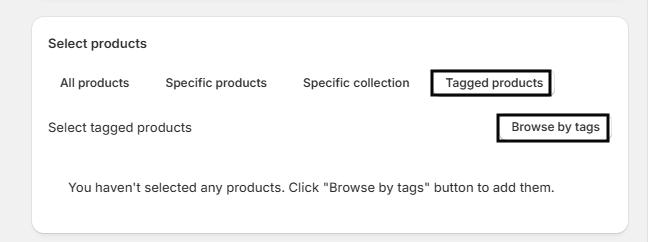
- Choose which products this discount applies to:
- All Products – Applies globally to your store.
- Specific Products – Click Browse Products to select individual items.
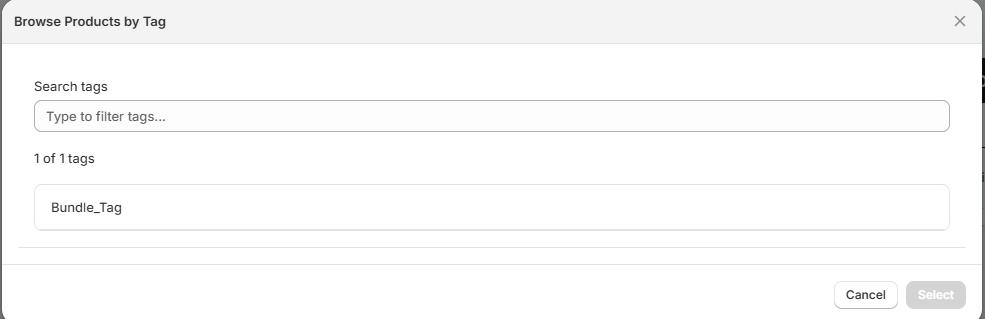
- Tagged Products – Click Browse by Tags to select groups of products using tags.
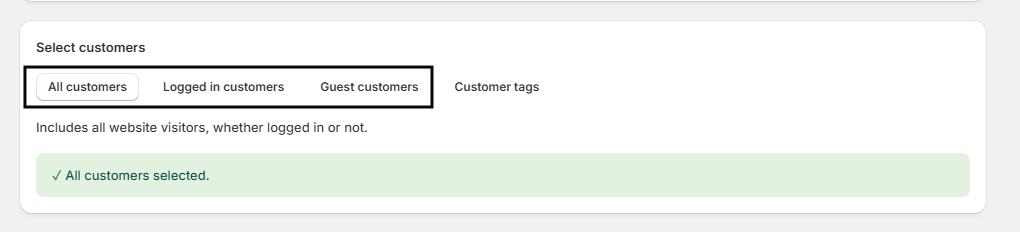
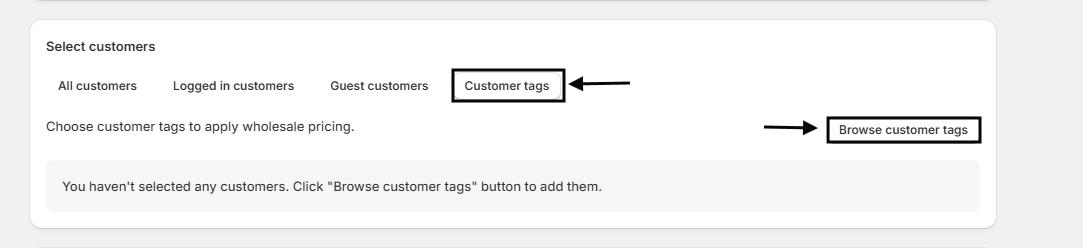
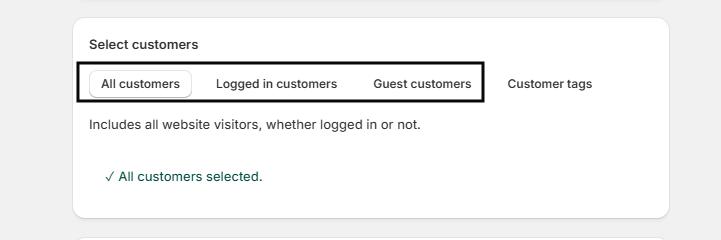
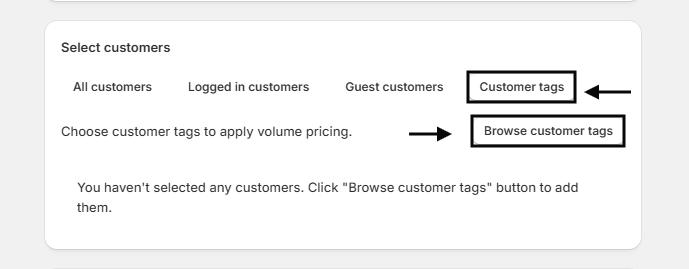
Step 5: Select Customers
Decide which customers can access this pricing plan:
- All Customers – Available to every visitor, logged in or not.
- Logged-in Customers – Restrict pricing to users with an account.
- Guest Customers – Available only to visitors who are not logged in.
- Customer Tags – Apply discounts to specific customer groups based on tags.
- Click Browse Customer Tags to select the relevant tags.

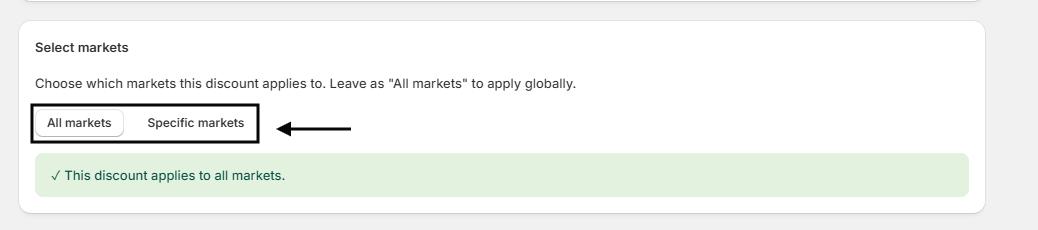
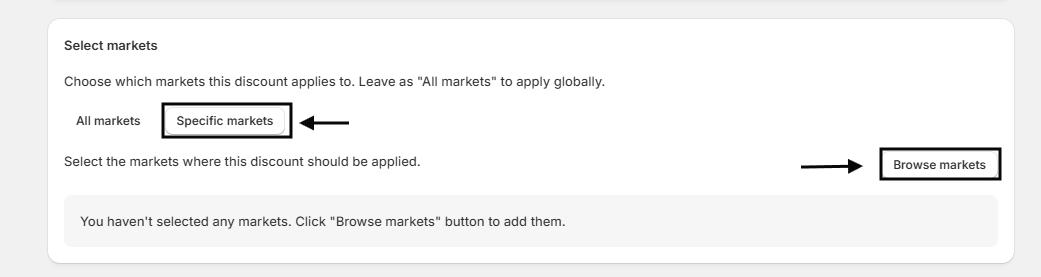
Step 6: Choose Markets
Determine which markets this discount applies to:
- All Markets – Apply globally.
- Specific Markets – Click Browse Markets to select regions where the discount will apply.

Step 7: Save and Activate
- Review your settings: products, customers, and markets.
- Once everything is configured, save the plan.
- You can activate the plan immediately or keep it as a Draft to make further adjustments.
Quick Tips:
- Use tags for efficiency: Tagging products and customers simplifies bulk pricing configuration.
- Test before activating: Preview your plan to ensure the discounts appear correctly for customers.
Combine strategies: You can create multiple plans targeting different customer segments and markets simultaneously.
Setting Up Quantity-Based Volume Pricing
Use Volume Pricing to offer discounts based on the quantity or total amount of products your customers purchase. This helps encourage bulk orders and increases sales efficiency.
Step 1: Access the App
- From your Shopify dashboard, go to the Apps section.
- Click on ECA: B2B Wholesale to open the app.

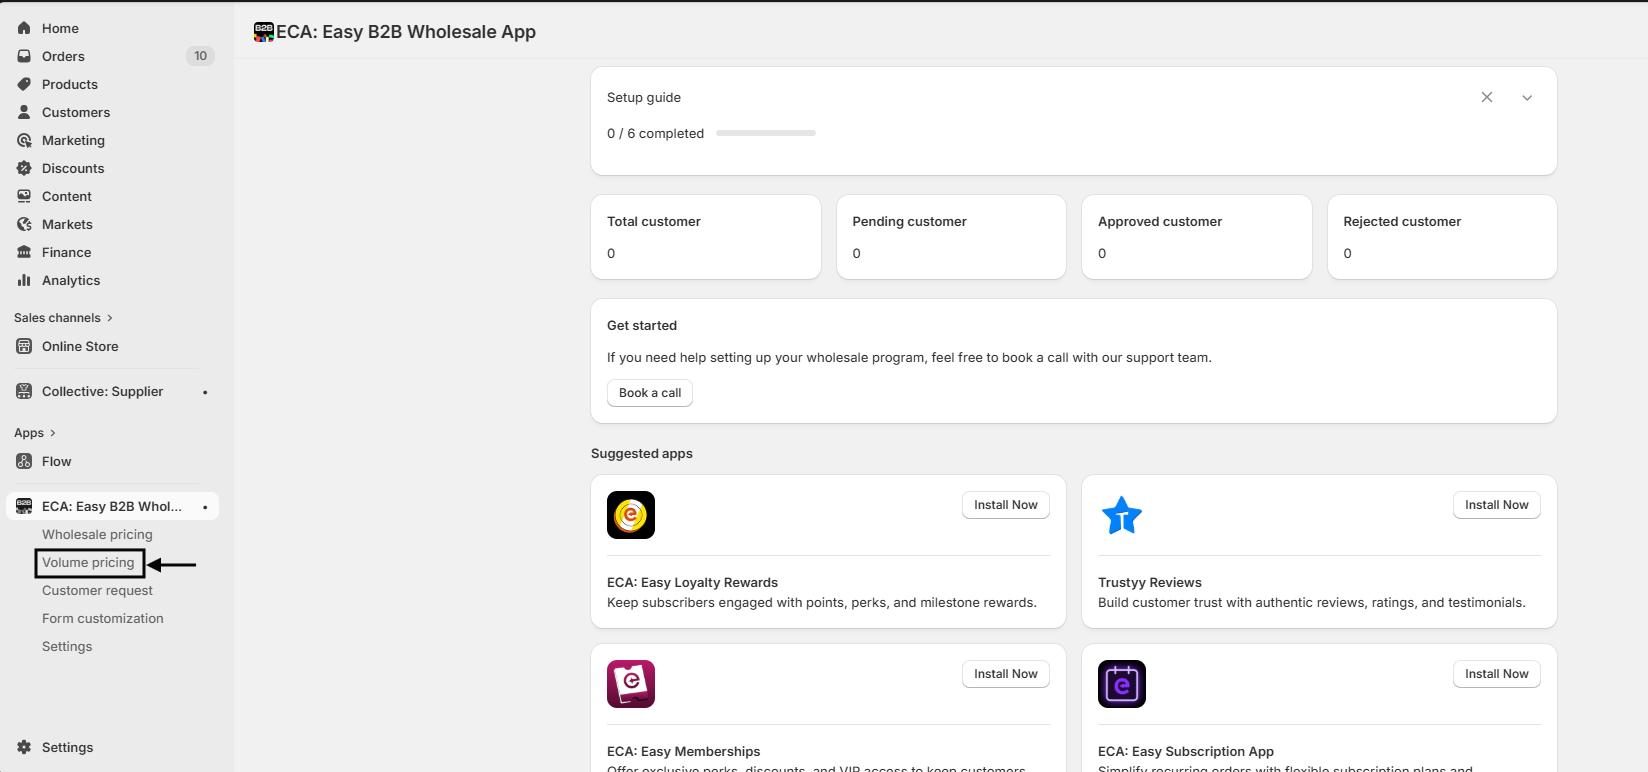
Step 2: Navigate to Volume Pricing
- In the app’s navigation menu, locate Volume Pricing.
- Click on it to view your existing volume pricing plans.
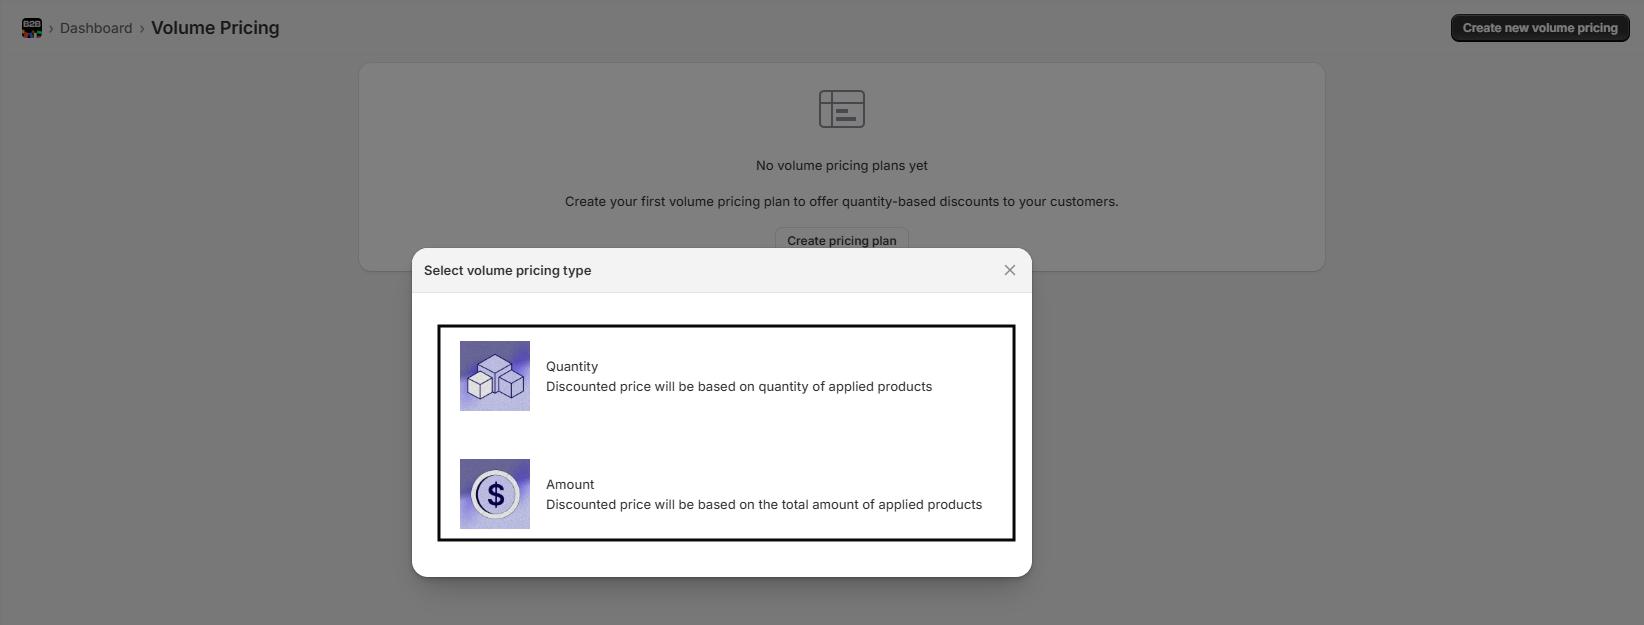
Step 3: Create a New Volume Pricing Plan
- Click Create New Volume Pricing.
- Choose a Volume Pricing Type:
- Quantity Volume – Discounts are applied based on the quantity of selected products.
- Price Volume – Discounts are applied based on the total amount of selected products.
- Enter a Pricing Plan Name (up to 50 characters).
- Example: “Bulk Buy Discount”

Step 4: Select Products
Choose which products this volume pricing will apply to:
- All Products – Applies globally to your store.
- Specific Products – Click Browse Products to select items.
- Products from Collections – Click Browse Collections to select entire collections.
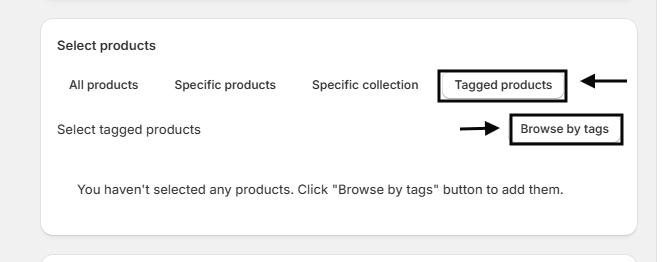
- Tagged Products – Click Browse by Tags to select products grouped by tags.
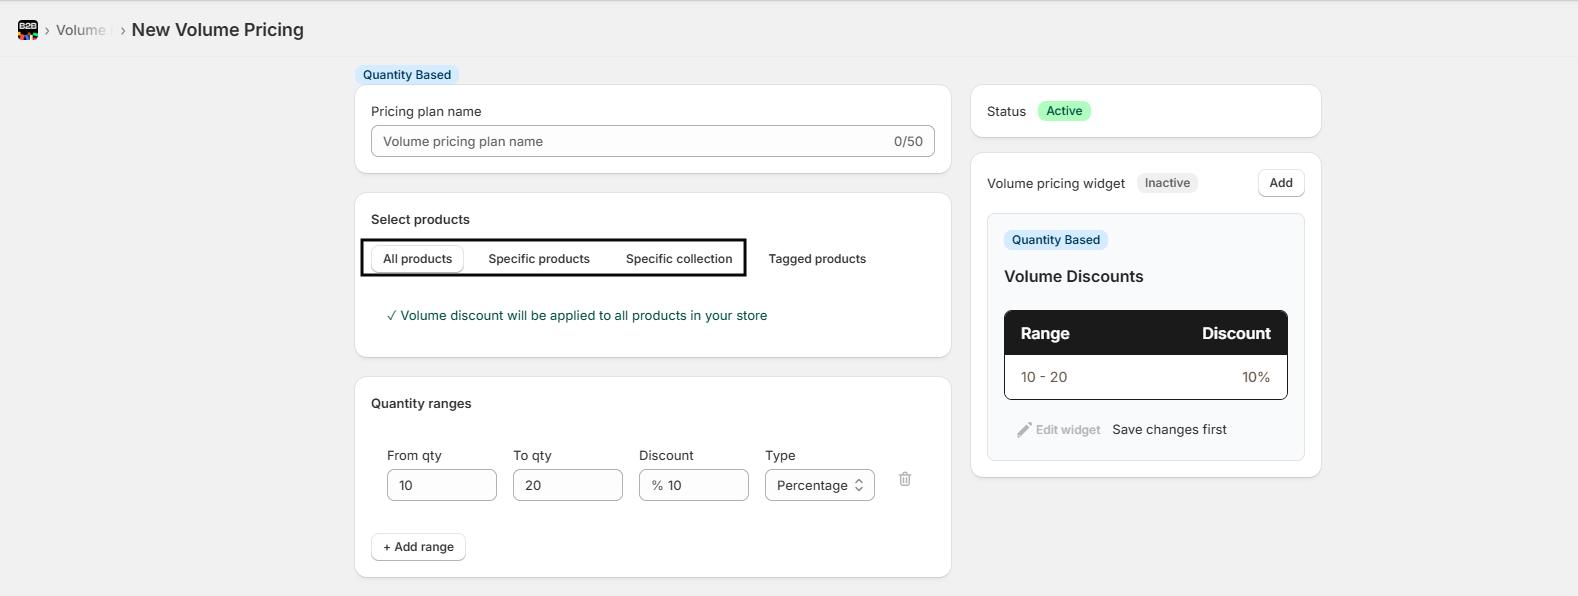
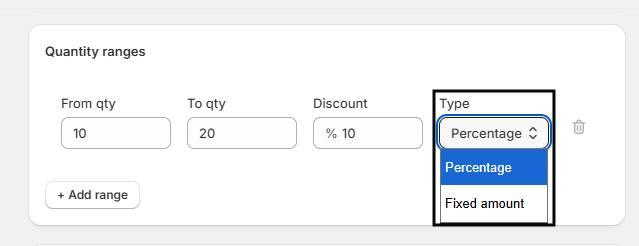
Step 5: Configure Quantity Ranges
- Define the quantity range for the discount:
- From Qty: Minimum units needed for discount.
- To Qty: Maximum units eligible for the discount.
- Enter the Discount Value and choose the Discount Type:
- Percentage Off – Reduces price by a percentage.
- Fixed Amount Off – Deducts a fixed amount per unit.

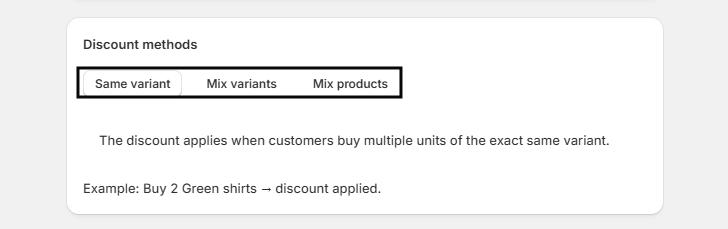
Step 6: Select Discount Method
Choose how the discount applies:
- Exact Variant – Discount applies when multiple units of the same product variant are purchased.
- Example: Buy 2 Green Shirts → discount applied.
- Mix Variants of the Same Product – Discount applies when different variants of the same product are purchased together.
- Example: Buy Green Shirt + Purple Shirt → discount applied.
- Mix Different Products – Discount applies when different selected products are purchased together.
- Example: Buy Green Shirt + Orange T-shirt → discount applied.
Step 7: Select Customers
Decide who can access this volume pricing plan:
- All Customers – Available to every visitor, logged in or not.
- Logged-in Customers – Only customers with accounts can access.
- Guest Customers – Only visitors without accounts.
- Customer Tags – Apply discounts to specific customer groups based on tags.
- Click Browse Customer Tags to select relevant tags.


Step 8: Choose Markets
Determine which markets or regions this discount applies to:
- All Markets – Apply globally.
- Specific Markets – Click Browse Markets to select the regions.

Step 9: Activate and Save
- Review all settings: products, quantity ranges, customers, and markets.
- Save your plan.
- Activate the plan to make it live.
- The Volume Pricing Widget will display the discount ranges on your storefront once active.
Quick Tips:
- Mixing products can increase cross-selling opportunities.
- Start with small quantity ranges to test the response before scaling.
- Use tags strategically to manage volume pricing across multiple products or customer groups.
- Always save changes first before making adjustments or activating the plan.
Amount-Based Volume Pricing
Use Amount-Based Volume Pricing to reward customers when they spend within a specific amount range on selected products. This allows you to offer strategic discounts for higher order values and encourage bulk purchasing.
Step 1: Access the Volume Pricing Section
- From your Shopify dashboard, go to the Apps section.
- Click ECA: B2B Wholesale.
- In the app navigation menu, select Volume Pricing.


Step 2: Create a New Volume Pricing Plan
- Click Create New Volume Pricing.
- Choose a Volume Pricing Type:
- Quantity Volume – Discount applies based on the number of units purchased.
- Price Volume – Discount applies based on the total spending amount.
- Enter a Volume Pricing Plan Name (up to 50 characters).
Example: “Spend $50-$100 Discount”


Step 3: Select Products
- Decide which products the volume discount applies to:
- All Products – Applies globally to all store products.
- Specific Products – Click Browse Products to select individual items.
- Tagged Products – Click Browse by Tags to select products using tags.
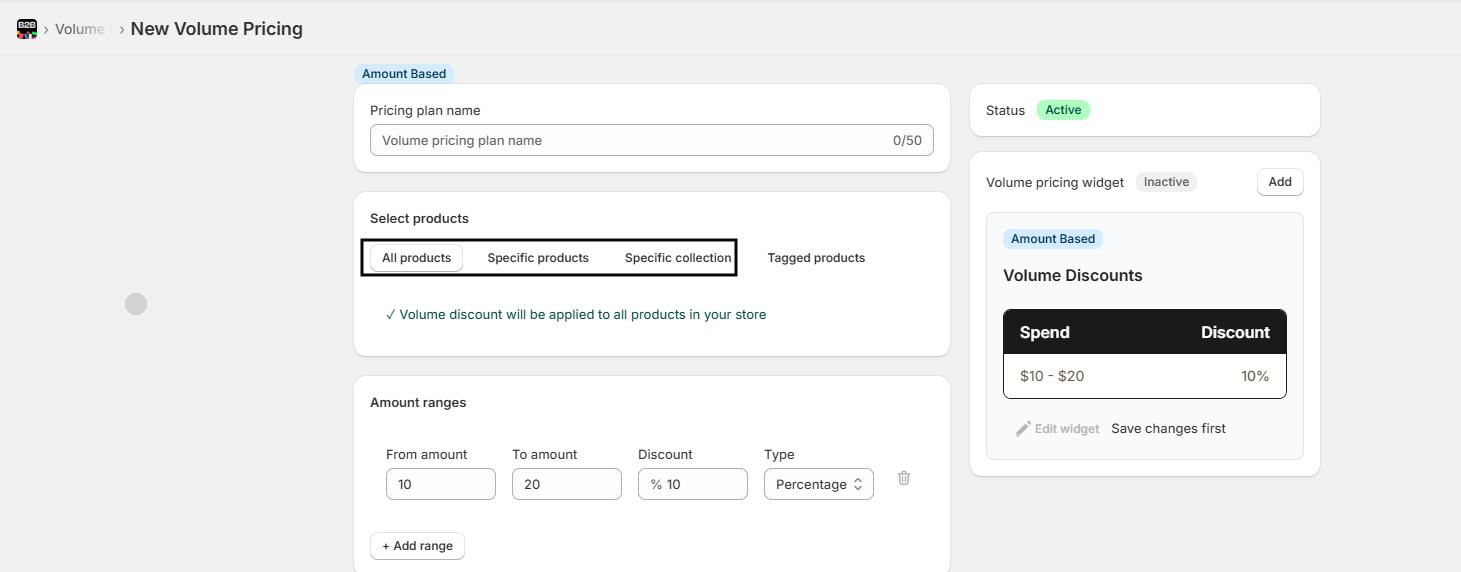
Step 4: Configure Amount Ranges and Discounts
- Set the Amount Range:
- From Amount – Minimum order value to qualify for the discount.
- To Amount – Maximum order value to qualify for the discount.
- Choose Discount Type:
- Percentage – Reduces the price by a percentage.
- Fixed Amount – Deducts a fixed amount from the total.
- Enter the Discount Value (e.g., 10%).
Example: Spend $10–$20 → 10% off.
Step 5: Select Discount Method
Decide how the discount applies to the products:
- Single Variant – Discount applies when customers buy multiple units of the same product variant.
- Example: Buy 2 Green Shirts → discount applied.
- Mixed Variants – Discount applies when customers buy multiple variants of the same product.
- Example: Buy Green Shirt + Purple Shirt → discount applied.
- Mixed Products – Discount applies when customers buy different products included in the rule.
- Example: Buy Green Shirt + Orange T-shirt → discount applied.

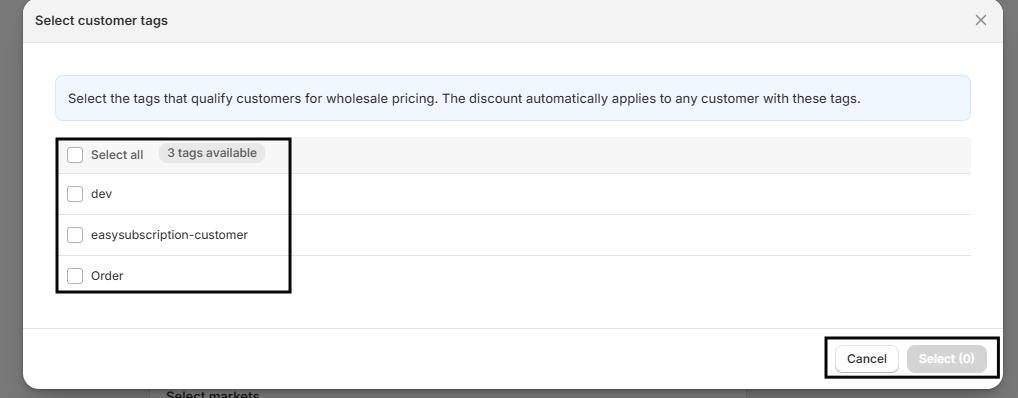
Step 6: Choose Customers
Determine which customer groups can access this pricing plan:
- All Customers – Applies to everyone visiting your store.
- Logged-in Customers – Restrict pricing to customers with accounts.
- Guest Customers – Applies only to visitors who are not logged in.
- Customer Tags – Apply discounts to specific customer groups using tags.
- Click Browse Customer Tags to select relevant tags.

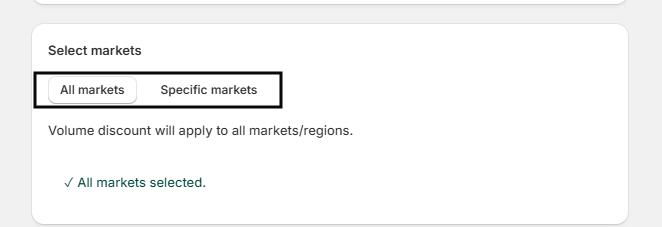
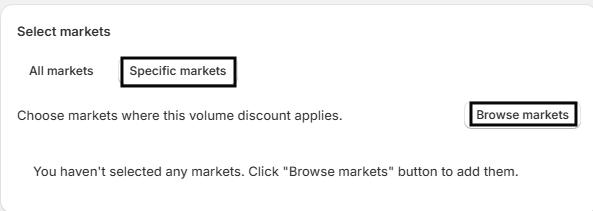
Step 7: Select Markets
Decide where this volume pricing applies:
- All Markets – Applies globally.
- Specific Markets – Click Browse Markets to select regions for this pricing plan.


Step 8: Activate and Save
- Review your settings: products, amount ranges, discount type, customers, and markets.
- Save your plan.
- Switch the Status to Active to enable the pricing plan immediately.
Tip: The Volume Pricing Widget can be displayed on the storefront to inform customers about the discount ranges.
Quick Tips:
- Use tags for flexibility: Group products or customers to simplify rules.
- Test before publishing: Make sure discounts apply correctly before going live.
- Combine strategies: Create multiple volume pricing plans for different products, customer groups, or markets.
Setting Up the Registration Form
The Wholesale Registration Form allows your B2B customers to create accounts, helping you manage wholesale access efficiently. Follow these steps to design and configure your form.
Step 1: Access the App
- From your Shopify dashboard, go to the Apps section.
- Click on ECA: B2B Wholesale to open the app.
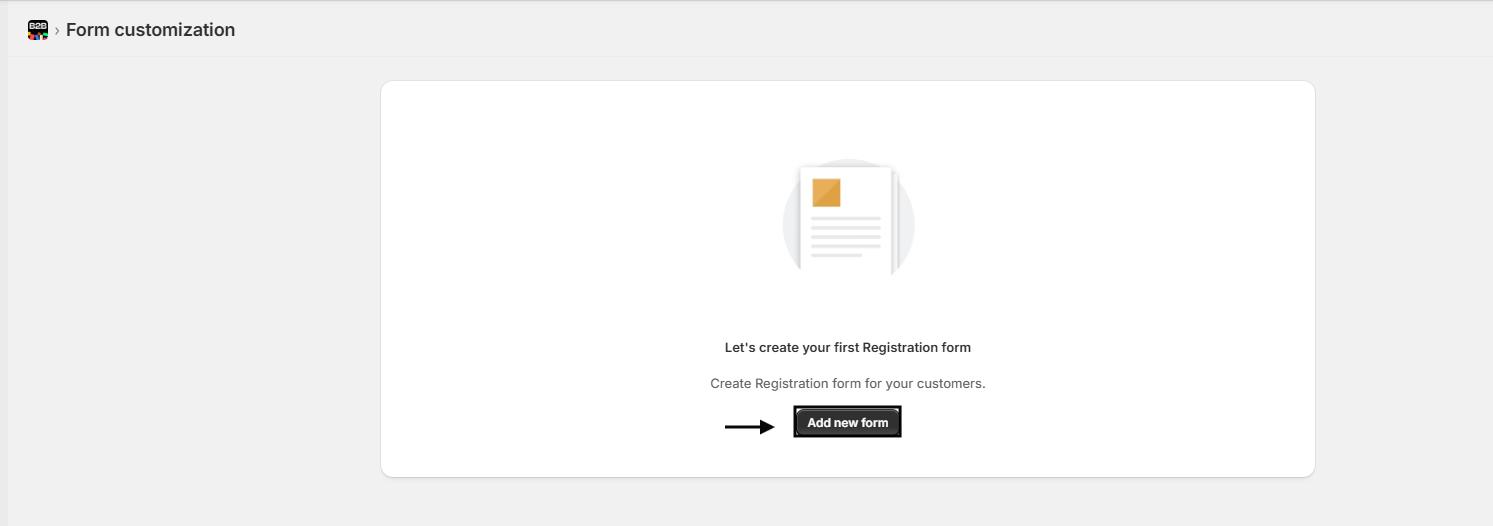
Step 2: Navigate to Form Customization
- In the app’s navigation menu, click on Form Customization.
- Click the Add New Form button to start creating your registration form.

Step 3: General Form Settings
Configure the basic form appearance and labels:
| Setting | Description | Example/Default |
|---|---|---|
| Form Title | The main title displayed at the top of the form | Registration Form |
| Button Text | Text displayed on the submit button | Submit |
| Form Border Radius | Rounded corners for the form container | 15 px |
| Input Border Radius | Rounded corners for each input field | 25 px |
Tip: Keep the form title clear and the button text action-oriented to guide customers effectively.

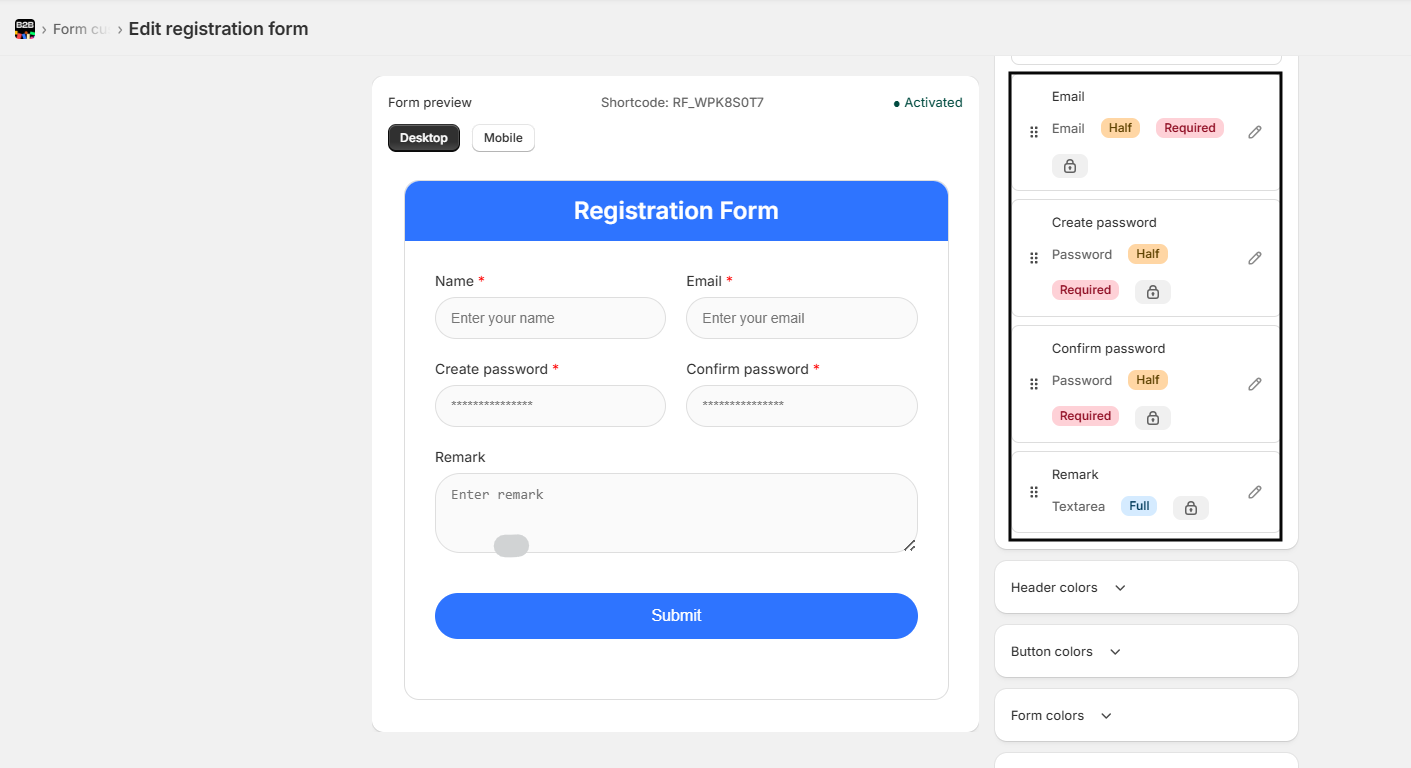
Step 4: Configure Form Fields
You can customize, reorder, and add fields as needed:
- Drag and Drop: Rearrange fields to match your preferred order.
- Add New Field: Click Add New Field to include additional inputs.
- Field Type: Choose from Text, Email, Password, or other available types.
- Label: Enter the field name (e.g., Name, Email, Remark).
- Placeholder: Add placeholder text to guide input (e.g., “Enter your email”).
- Field Width: Choose Full Width or customize width.
- Required Field: Toggle on if the field must be filled in.
Step 5: Customize Colors
Make the form visually consistent with your store’s branding:
Header Colors
- Header Background: Set background color (e.g., #2E74FF)
- Header Text: Set text color (e.g., #FFFFFF)
Button Colors
- Button Background: Set button color (e.g., #2E74FF)
- Button Text: Set text color (e.g., #FFFFFF)
Form Colors
- Form Background: Set form container color (e.g., #FFFFFF)
- Label Color: Set field label color (e.g., #333333)
Input Colors
- Input Background: Set input field color (e.g., #FAFAFA)
- Input Border: Set border color (e.g., #DEDEDE)
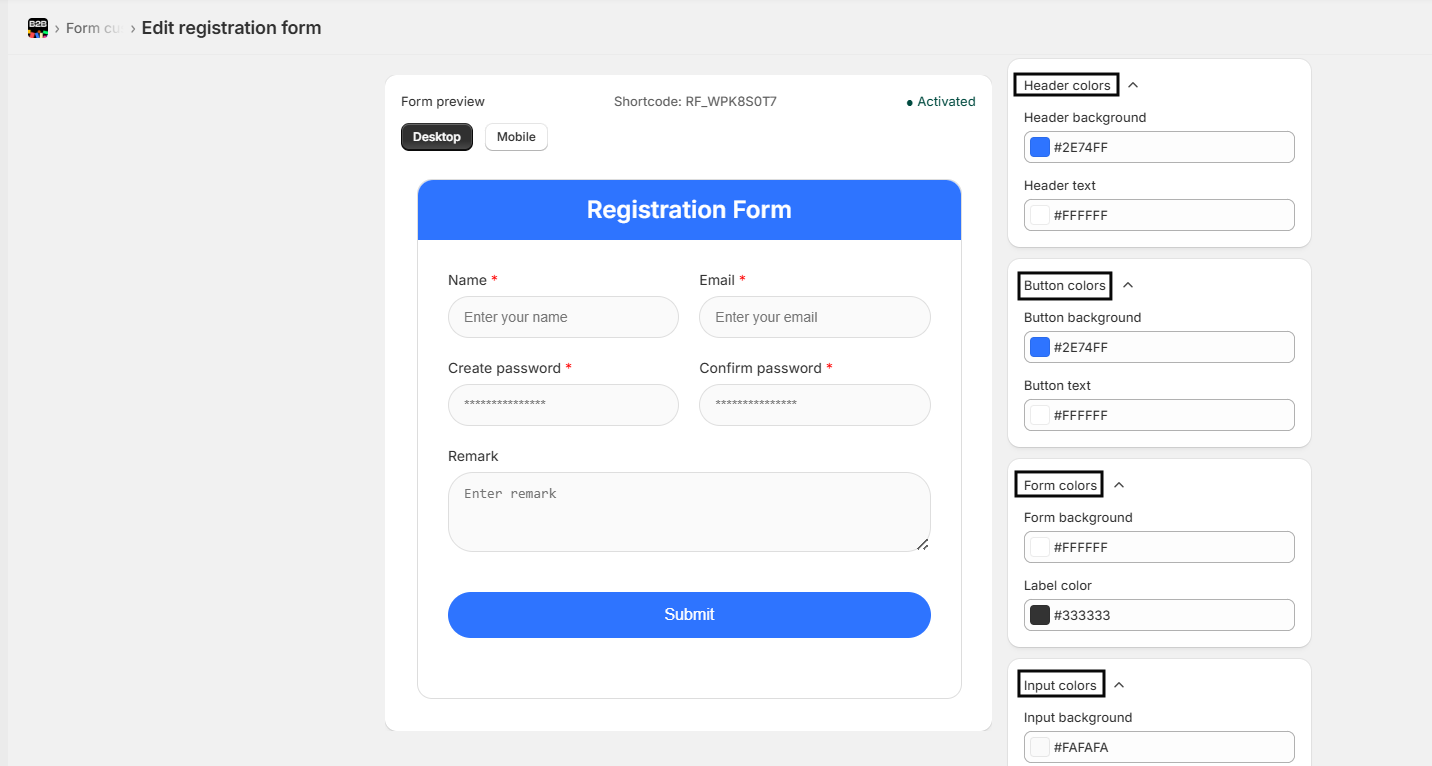
Step 6: Preview and Activate
- Check the Form Preview panel to see how the form will appear to customers.
- Make sure all fields, colors, and buttons appear as intended.
- Once satisfied, Activate the form so it’s live for your wholesale customers.
Quick Check: Test the form by submitting a sample registration to ensure all fields and validations work correctly.
Best Practices
- Keep the number of fields minimal to improve form completion rates.
- Use clear labels and placeholders to guide users.
- Ensure the submit button text reflects the action, like “Register” or “Sign Up.”
- Preview on desktop and mobile to confirm responsiveness.
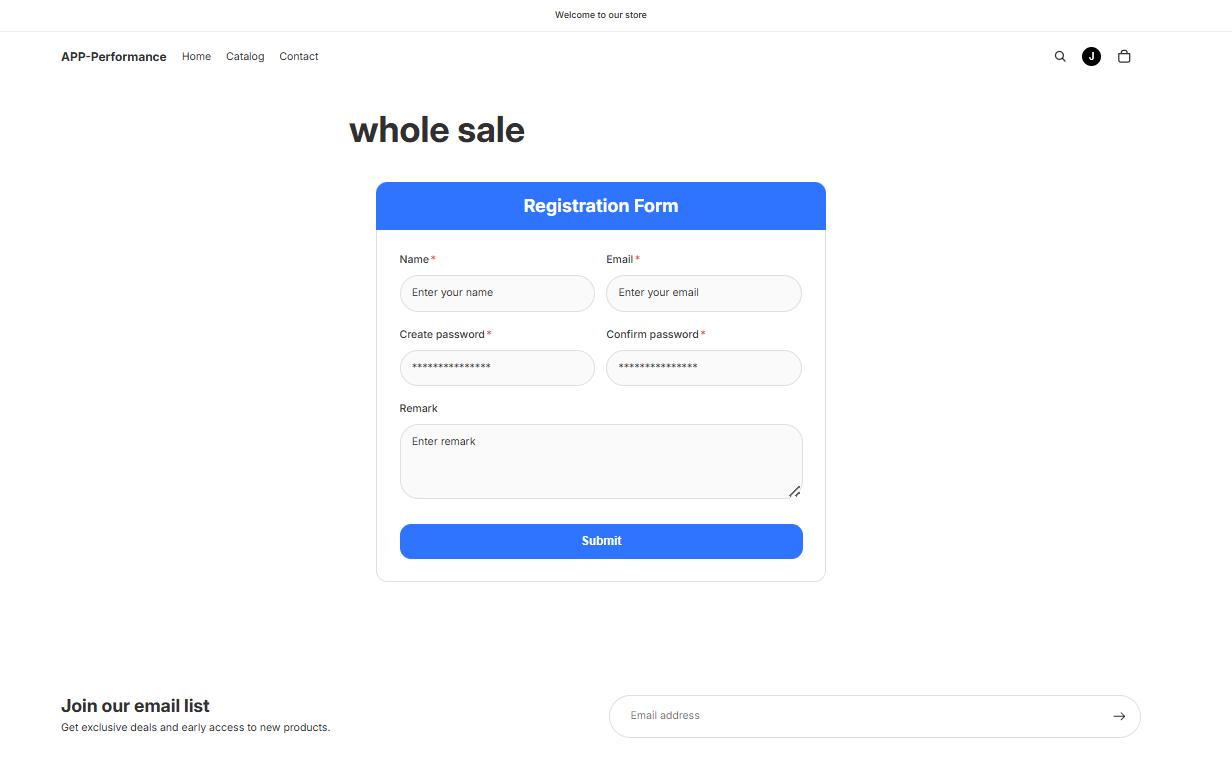
Embedding the Wholesale Registration Form
Make it easy for customers to register for wholesale access directly from your Shopify store by embedding the Wholesale Registration Form.
Step 1: Access the App
- From your Shopify dashboard, navigate to the Apps section.
- Open ECA: B2B Wholesale.

Step 2: Get the Form Shortcode
- Go to the Form Customization page in the app.
- Copy the shortcode provided for your Wholesale Registration Form.
- Example: [wholesale_form=”RF_XXXXXXXX”]

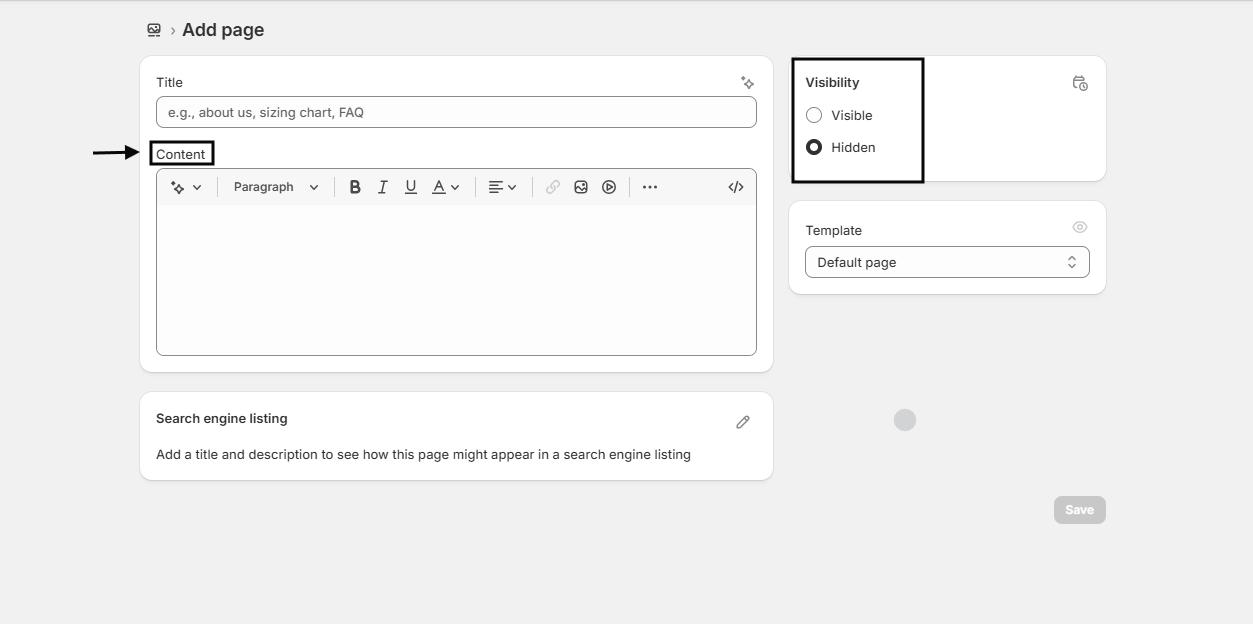
Step 3: Add the Form to a Shopify Page
- From your Shopify admin, go to Online Store → Pages.
- Create a new page or select an existing page where you want the form to appear.
- Paste the shortcode into the page content.
Tip: Ensure the shortcode is placed where you want the form to display within the page.

Step 4: Enable the Theme Extension
- Go to Online Store → Themes → Customize.
- Enable the Wholesale Registration Form theme extension.
- Once activated, the form will appear on the selected page.

Quick Tips:
- Test your form: Open the page as a visitor to ensure the form displays correctly.
- Multiple pages: You can use the shortcode on multiple pages if needed.
- Customize appearance: Form styling can be adjusted via the Form Customization settings in the app.
Embedding & Activating Wholesale Pricing
Follow these steps to display wholesale pricing on your storefront and customize its appearance to match your store’s theme.
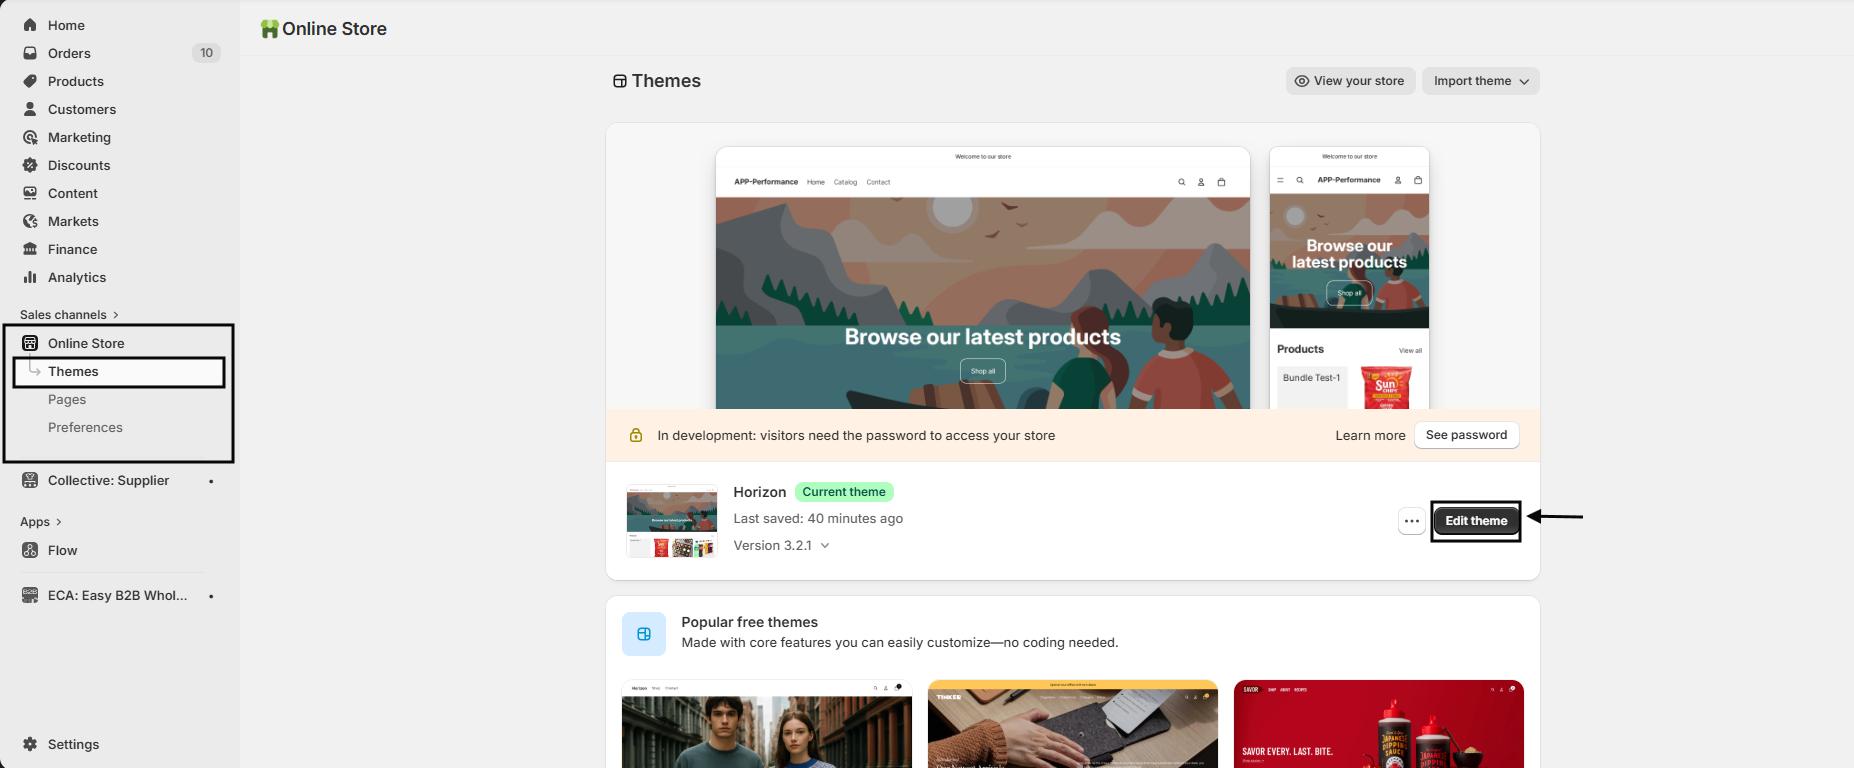
Step 1: Access Your Online Store
- From your Shopify dashboard, navigate to the Online Store.
- Click Edit Theme to open the theme editor.

Step 2: Locate the App Embed
- In the left-hand ribbon of the theme editor, scroll to App Embeds.
- Find ECA: Easy B2B Wholesale App in the list of available app blocks.
Step 3: Enable the Wholesale Pricing Display
- Toggle Enable Wholesale Price Display to turn on wholesale pricing on your storefront.
- This will automatically show wholesale prices for eligible customers based on your pricing plans.

Step 4: Customize Plan Name Styling
Adjust how the wholesale plan name appears above your product prices:
- Hide Plan Name: Toggle to hide the plan name label if you prefer a cleaner display.
- Plan Name Color: Set the color (e.g., #666666).
- Plan Name Font Size: Choose a font size (e.g., 12px).
- Plan Name Font Weight: Select the weight (e.g., Medium).

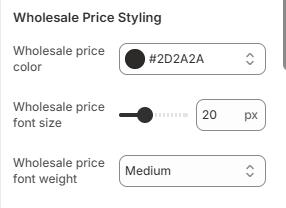
Step 5: Customize Wholesale Price Styling
Set how wholesale prices appear on your storefront:
- Wholesale Price Color: Choose a color for the wholesale price (e.g., #2D2A2A).
- Wholesale Price Font Size: Set the font size (e.g., 18px).
- Wholesale Price Font Weight: Select the weight (e.g., Medium).
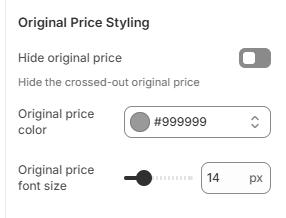
Step 6: Customize Original Price Styling
Control how the original product price is displayed:
- Hide Original Price: Toggle to hide the crossed-out original price.
- Original Price Color: Set a color (e.g., #999999).
- Original Price Font Size: Adjust the size (e.g., 14px).
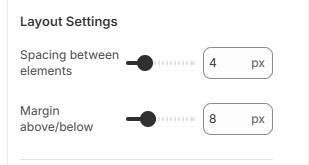
Step 7: Layout Settings
Fine-tune spacing for a clean layout:
- Spacing Between Elements: Adjust the spacing (e.g., 4px).
- Margin Above/Below: Set margin values (e.g., 8px) for balance.
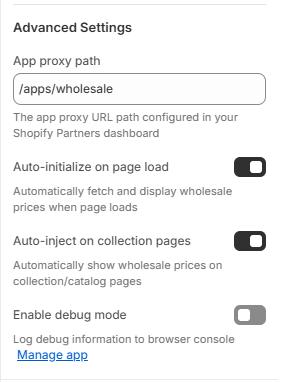
Step 8: Advanced Settings
Control advanced app behaviors:
- App Proxy Path: /apps/wholesale – ensures correct app routing.
- Auto-initialize on Page Load: Automatically fetch and display wholesale prices when the page loads.
- Auto-inject on Collection Pages: Show wholesale prices on collection/catalog pages automatically.
- Enable Debug Mode: Logs debug information to your browser console for troubleshooting.
Step 9: Save and Publish
- Review all settings to ensure your styling and display options are correct.
- Click Save in the theme editor.
- Preview your store to confirm that wholesale pricing is visible and styled as expected.
Quick Tips:
- Preview before publishing: Make sure your wholesale prices appear correctly for different customer types.
- Consistent branding: Match plan name and price colors to your store’s theme for a professional look.
- Test across devices: Ensure the layout and spacing look good on desktop and mobile.
- Debug mode: Enable temporarily if you encounter display issues.
Embedding the Volume Pricing Widget
Display your Volume Pricing discounts directly on your product pages using the ECA: Easy B2B Wholesale Volume Pricing Widget. This allows customers to see applicable discounts while shopping, encouraging bulk purchases.
Step 1: Access Your Theme Editor
- From your Shopify dashboard, go to the Online Store section.
- Click Edit Theme on the theme you want to customize.
Step 2: Navigate to the Product Template
- In the top middle page selector, choose the product template where you want the Volume Pricing widget to appear.
- This ensures the widget only appears on the intended product pages.
Step 3: Add the Volume Pricing Widget
- In the left-hand editor panel, open the Product Form section.
- Click Add Block.
- Select ECA: Easy B2B Volume Pricing Widget.
- Drag the widget block to your preferred position on the product page.

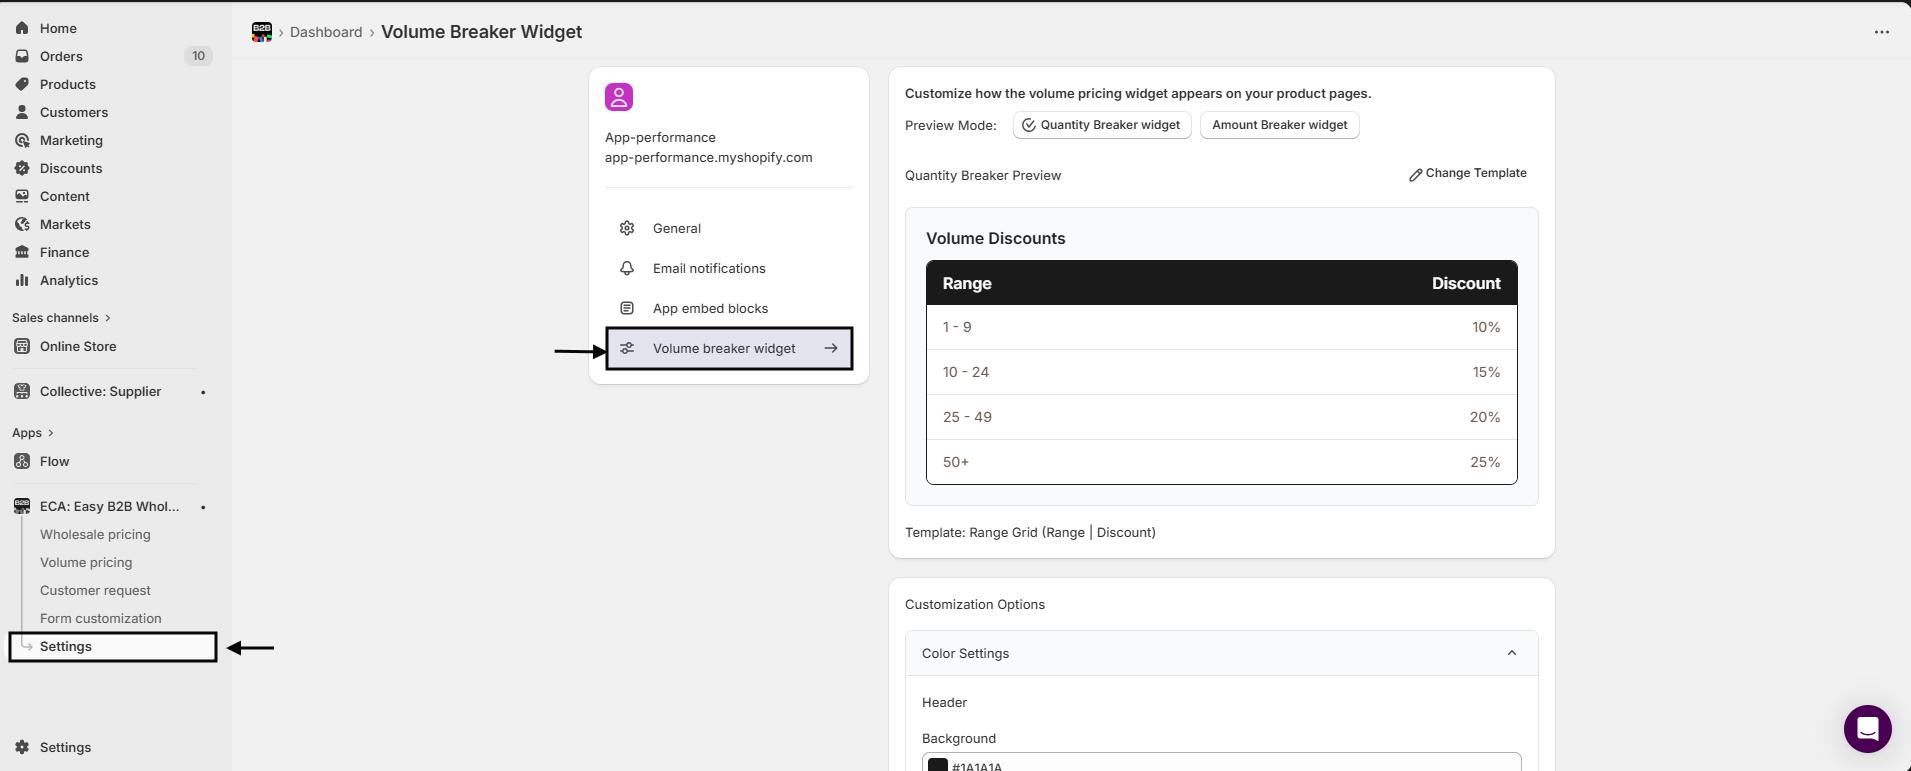
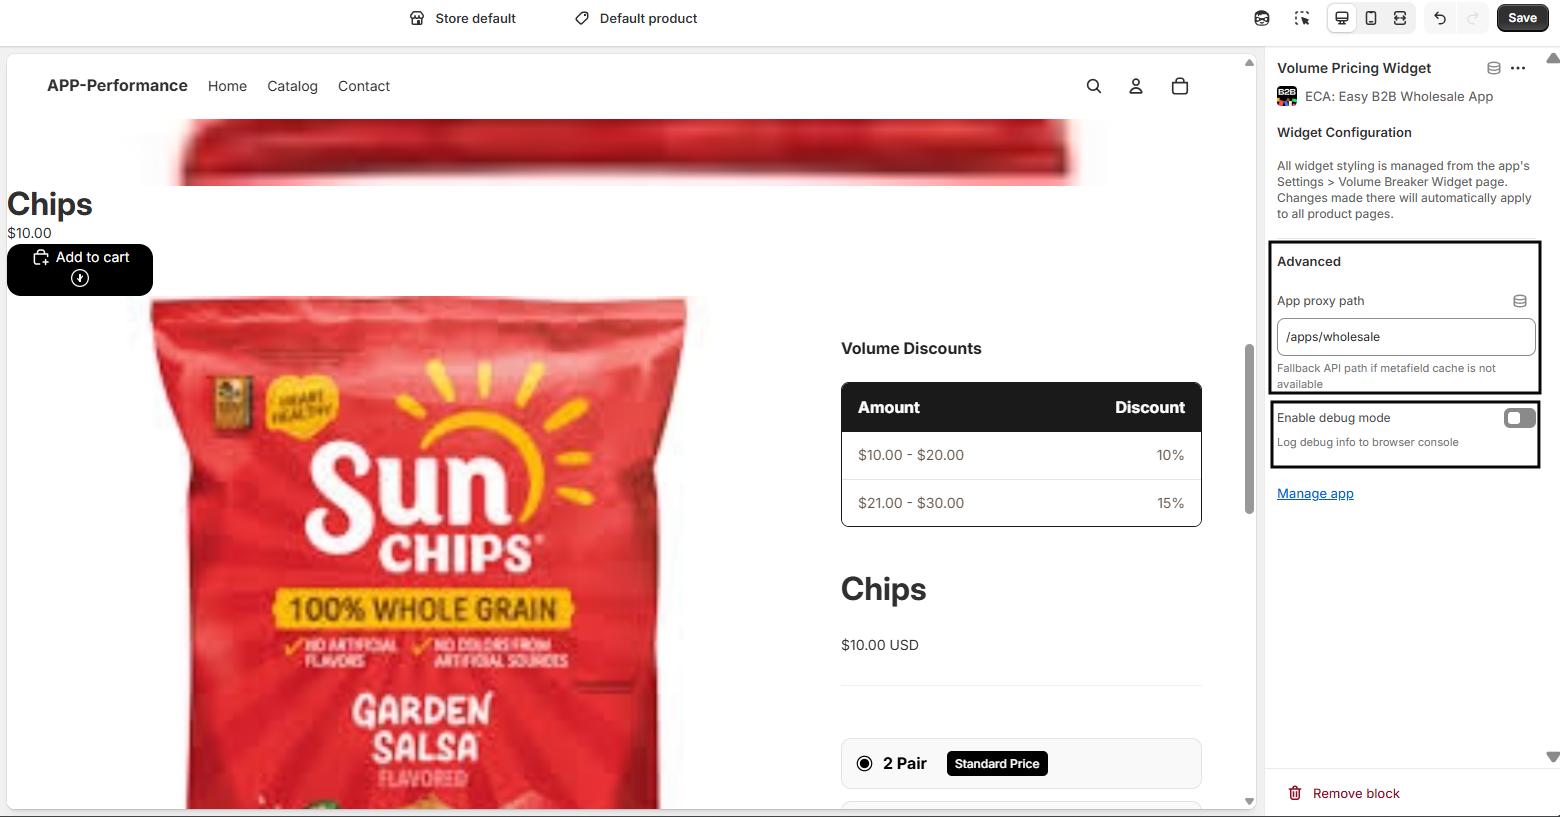
Step 4: Widget Configuration
All styling and display settings for the widget are managed from the app itself:
- Navigate to Settings > Volume Breaker Widget in the ECA app.
- Changes made there automatically update across all product pages.
Advanced Options:
- App Proxy Path – /apps/wholesale
- Fallback API path if metafield cache is unavailable.
- Enable Debug Mode – Logs debug information to the browser console for troubleshooting.
Step 5: Save and Publish
- Once you’ve positioned and configured the widget, click Save in the theme editor.
- The widget will now appear on the selected product pages, displaying volume pricing ranges to customers in real-time.
Quick Tips:
- Preview before publishing: Check a product page to ensure the widget appears correctly.
- Use advanced settings only if needed: Debug mode is primarily for troubleshooting.
- Consistent styling: Configure widget styling in the app settings for a uniform look across your store.
Managing Multiple Volume Pricing Plans
When multiple volume pricing plans apply to the same product, you can control which pricing plan is displayed to customers on the product page. The Multiple Volume Pricing setting allows you to define how pricing rules behave and which plan takes priority.
Step 1: Open the Easy B2B Wholesale App
- From your Shopify dashboard, go to the Apps section.
- Open ECA: B2B Wholesale.

Step 2: Access Settings
- From the app’s navigation menu, click Settings.
- Navigate to General Settings.

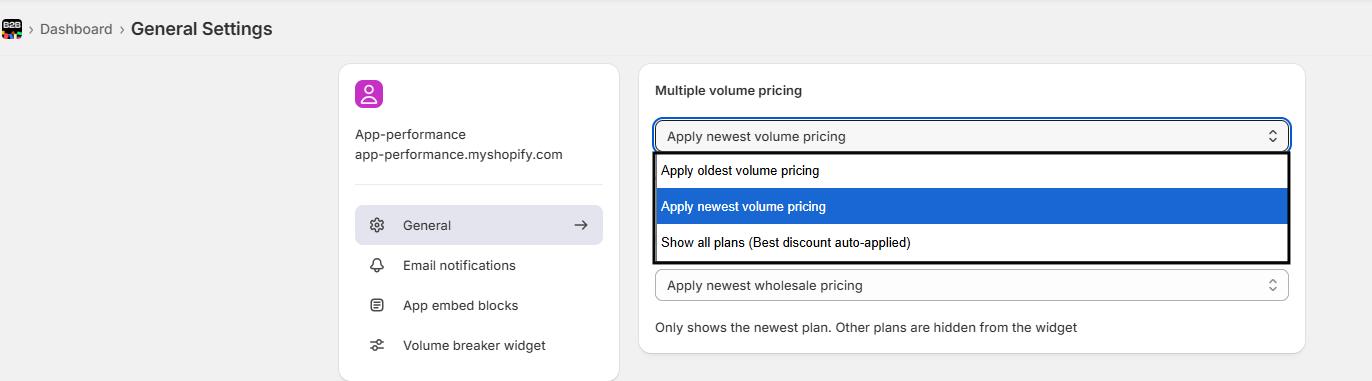
Step 3: Configure Multiple Volume Pricing Behavior
Under Multiple Volume Pricing, choose how pricing plans should be displayed when more than one plan applies to a product.
Option 1: Apply Oldest Volume Pricing
- Displays only the oldest created pricing plan.
- All newer pricing plans are hidden from the pricing widget.
- Best suited when legacy pricing rules must always take priority.
Option 2: Apply Newest Volume Pricing
- Displays only the most recently created pricing plan.
- Older pricing plans are hidden from the pricing widget.
- Recommended when newer pricing rules should override previous ones.
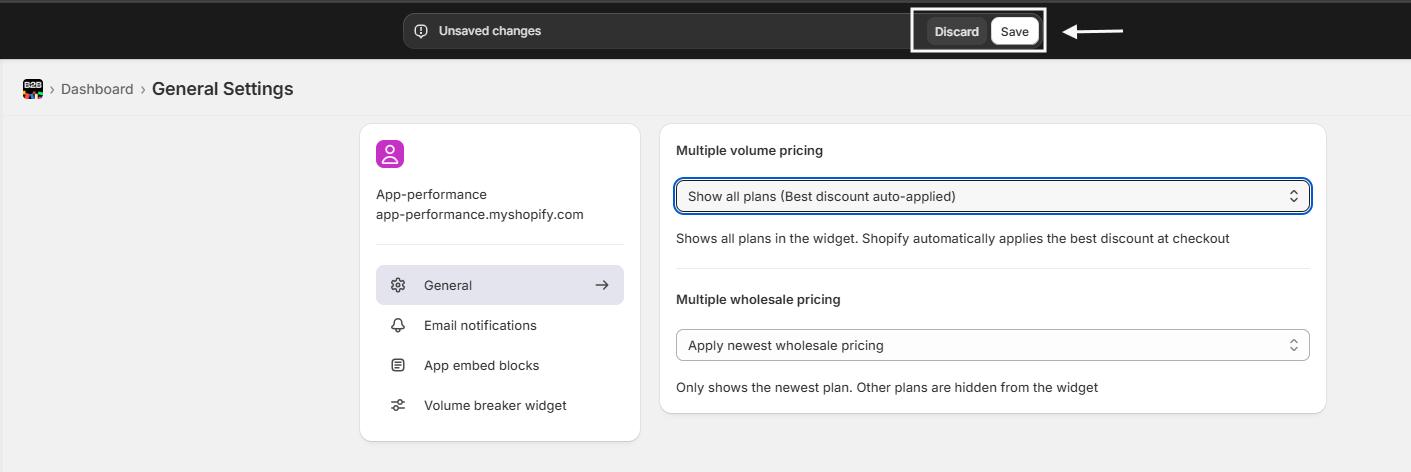
Option 3: Show All Plans (Best Discount Auto-Applied)
- Displays all applicable pricing plans in the pricing widget.
- Shopify automatically applies the best available discount at checkout.
- Ideal for offering transparency and ensuring customers receive the maximum savings.
Step 4: Save Your Changes
Once you’ve selected the preferred option, click Save to apply the changes.
Best Practices:
- Use the Oldest Plan if you want consistent, long-standing pricing rules.
- Use the Newest Plan when frequently updating or testing pricing strategies.
- Use Show All Plans to maximize conversion and avoid customer confusion at checkout.
Managing Multiple Wholesale Pricing Plans
When multiple wholesale pricing rules apply to the same product, the Multiple Wholesale Pricing setting lets you control which pricing plans are displayed to customers on the product page and how discounts are applied at checkout.
Step 1: Access the App Settings
- From your Shopify dashboard, go to Apps.
- Open ECA: B2B Wholesale.

Step 2: Open General Settings
- In the app’s navigation menu, click Settings.
- Navigate to General Settings.
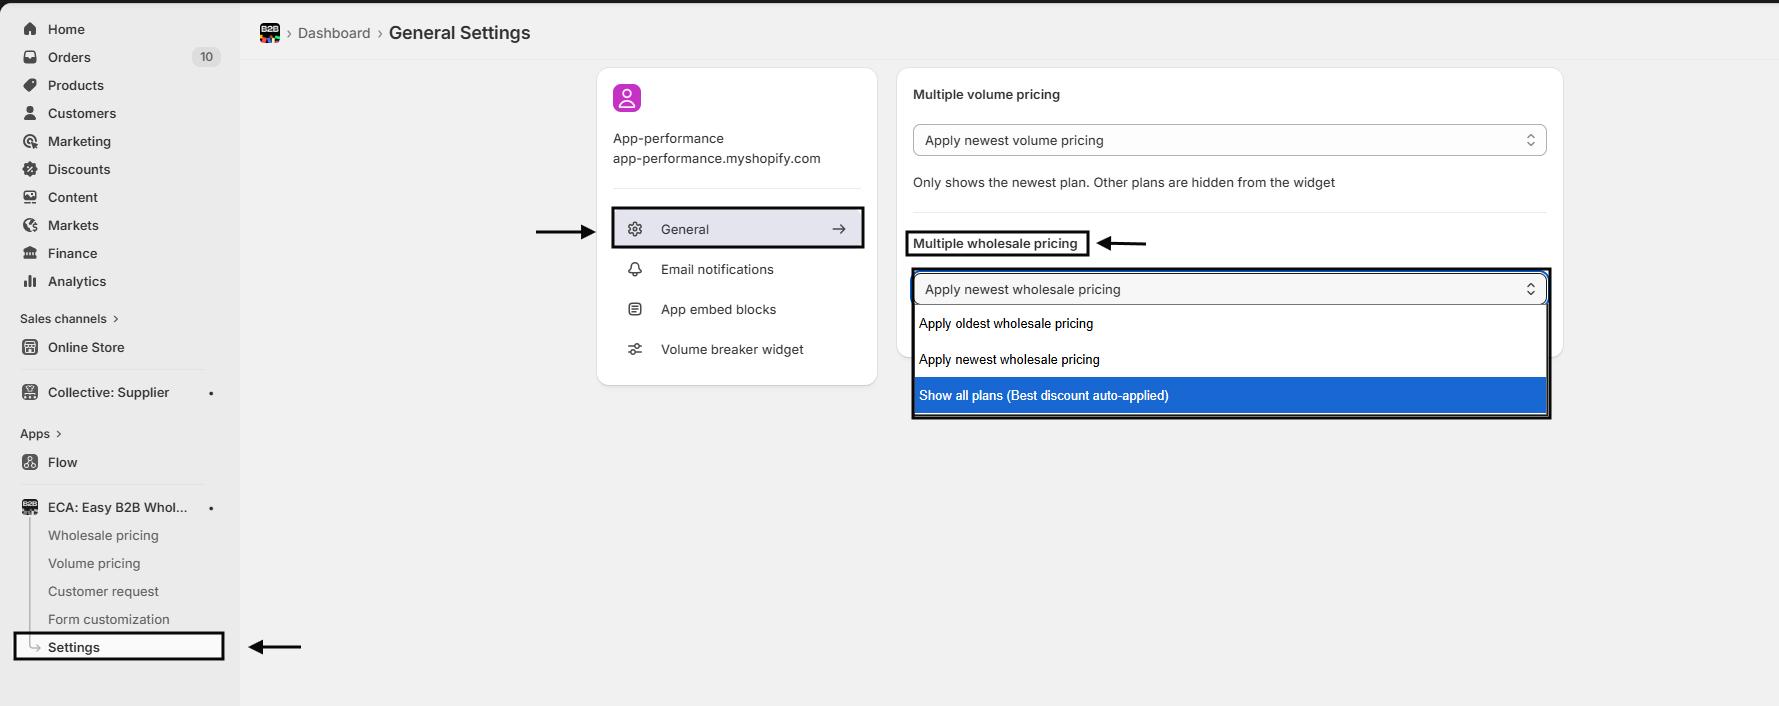
Step 3: Configure Multiple Wholesale Pricing Behavior
Under Multiple Wholesale Pricing, choose how volume pricing plans should appear on product pages.
Option 1: Apply Newest Wholesale Pricing
- Displays only the most recently created pricing plan on the product page.
- All older pricing plans are hidden from the pricing widget.
- Ideal if you want to:
- Prioritize your latest pricing strategy
- Avoid confusing customers with multiple discount tiers
- Keep the product page clean and focused
Best for: Merchants who frequently update pricing and want full control over what customers see.
Option 2: Show All Plans (Best Discount Auto-Applied)
- Displays all eligible pricing plans in the pricing widget.
- At checkout, Shopify automatically applies the best available discount for the customer.
- Ideal if you want to:
- Offer transparent pricing options
- Let customers compare volume discounts
- Ensure customers always receive the maximum savings
Best for: Merchants offering tiered or competitive volume discounts.
Step 4: Save Your Settings
Once selected, save your changes. The updated pricing behavior will apply immediately across your store.

Helpful Notes:
- This setting affects product page display only; checkout logic always follows Shopify’s discount rules.
- If multiple plans target the same customer and product, this setting prevents overlap and confusion.
- You can change this option anytime based on your sales strategy.
Email Notifications Setup
Email notifications help keep your wholesale customers informed about the status of their requests. You can easily control when these emails are sent directly from the app settings.
Step 1: Open the Easy B2B Wholesale App
- From your Shopify dashboard, navigate to the Apps section.
- Click on ECA: B2B Wholesale to open the app.

Step 2: Access Settings
- From the app’s navigation menu, select Settings.
- Inside Settings, click on Email Notifications.
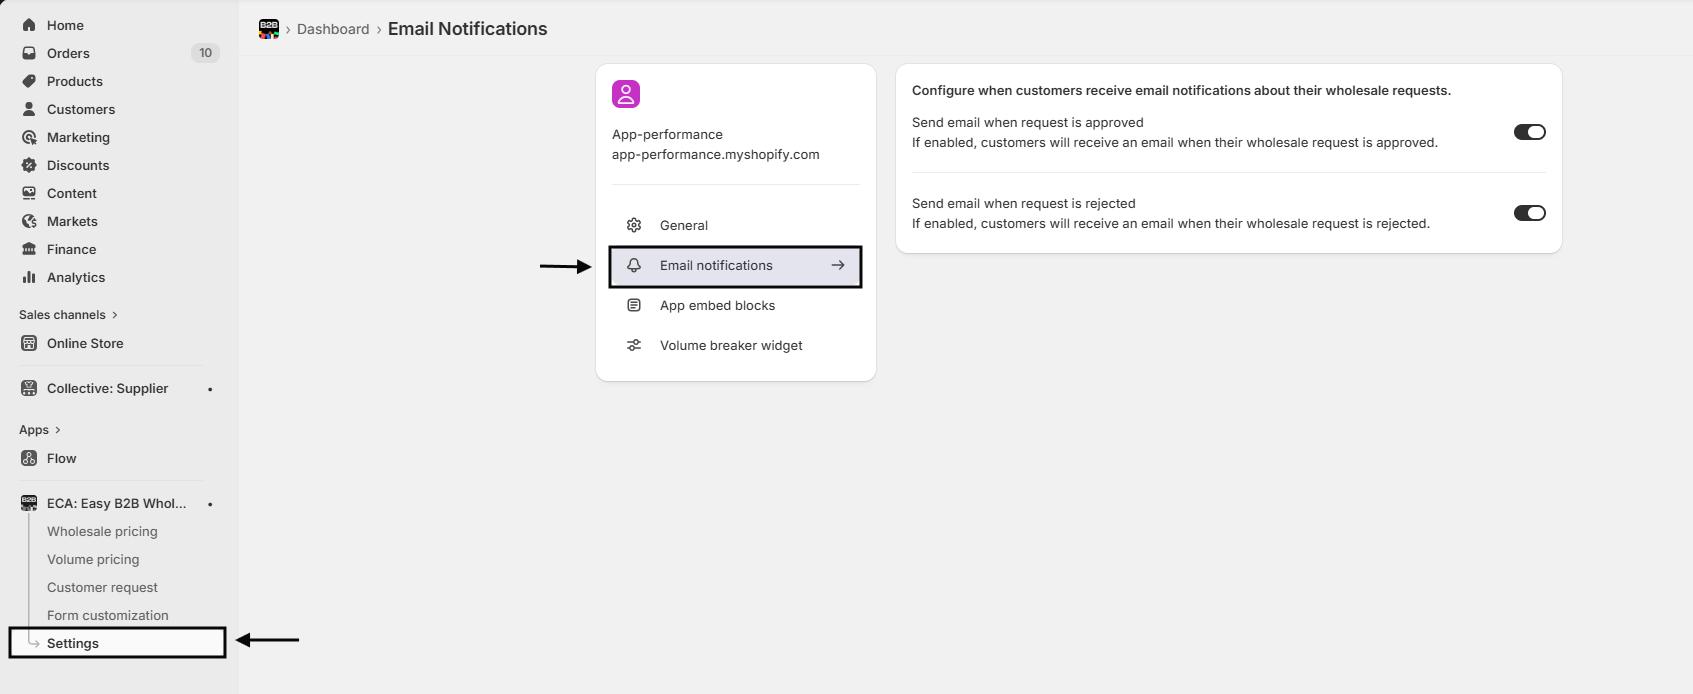
Step 3: Configure Email Notifications
In this section, you can manage when customers receive emails related to their wholesale requests.
Available Notification Options:
- Send email when request is approved
- When enabled, customers will automatically receive an email once their wholesale request is approved.
- Send email when request is rejected
- When enabled, customers will receive an email if their wholesale request is rejected.
You can enable one or both options depending on how you want to communicate with customers.
Step 4: Save Your Changes
After configuring the notification settings:
- Click Save to apply and store your changes.

Helpful Notes
- Enabling these notifications improves transparency and reduces follow-up inquiries from customers.
- Customers are informed instantly, ensuring a smoother wholesale onboarding experience.
- You can update these settings anytime based on your communication preferences.
Customizing the Volume Pricing Widget
The Volume Pricing Widget allows you to visually display quantity-based or amount-based discounts on your product pages. You can fully customize its layout, colors, text, and styling to match your storefront.
Step 1: Access the App Settings
- From your Shopify dashboard, go to Apps.
- Open ECA: B2B Wholesale.
- From the navigation menu, click Settings.
- Navigate to the Volume Breaked Widget section.

Step 2: Preview the Widget
Use Preview Mode to see how the widget will appear on product pages before saving changes.
Preview Types
- Quantity Breaker Preview – Displays discounts based on item quantity.
- Amount Breaker Preview – Displays discounts based on cart spend amount.
The preview updates in real time as you customize the widget.

Step 3: Select a Widget Template
Select the template that best matches your storefront layout and customer experience.
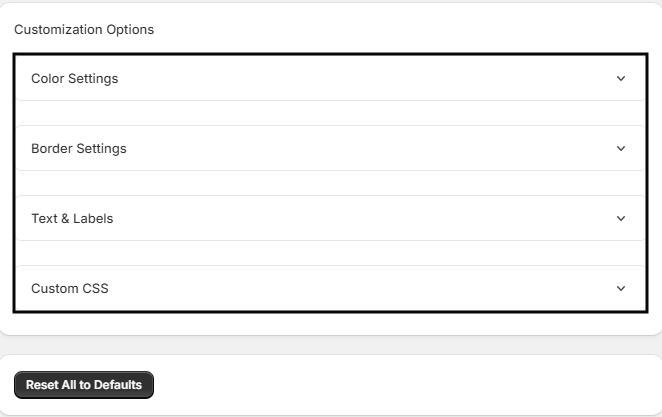
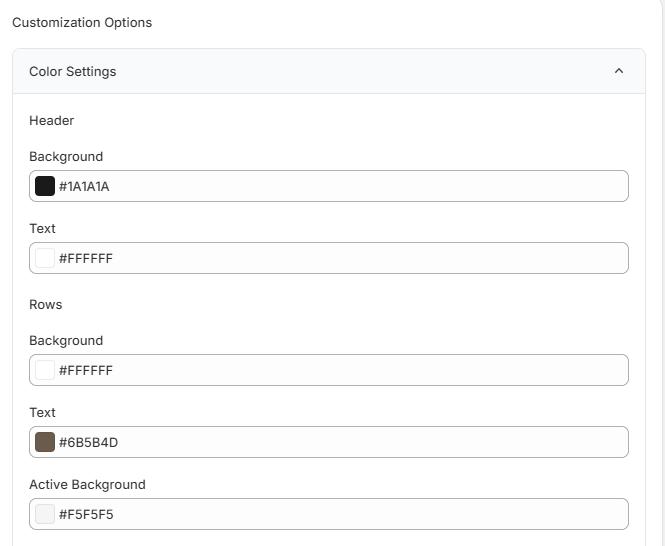
Step 4: Customize Colors and Styling
Header Styling
- Background Color
- Text Color
Row Styling
- Row Background Color
- Row Text Color
- Active Row Background – Highlights the applicable discount range
- Active Row Text Color
Border Styling
- Border Color
- Divider Color

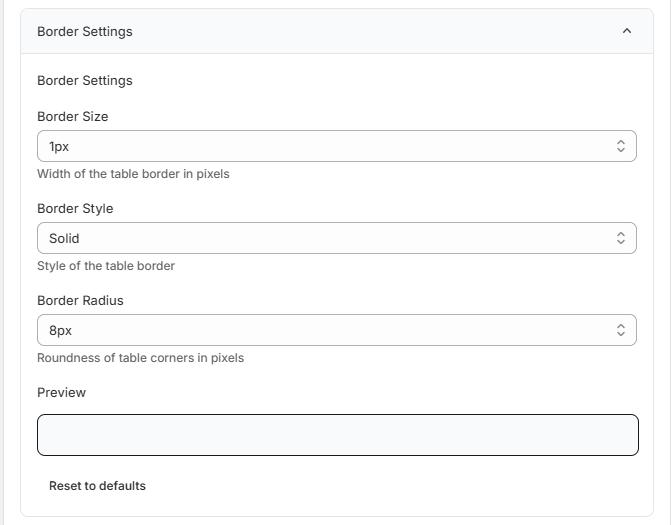
Step 5: Border Settings
Fine-tune the widget layout:
- Border Size – Set border width (e.g., 1px)
- Border Style – Solid, dashed, etc.
- Border Radius – Adjust corner roundness (e.g., 8px)
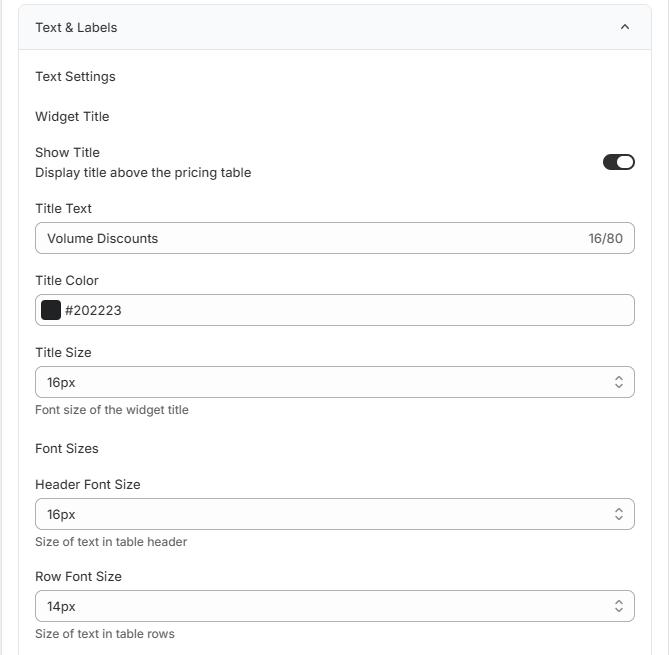
Step 6: Text and Label Settings
Widget Title
- Show Title – Toggle title visibility
- Title Text – Example: Volume Discounts
- Title Color
- Title Font Size
Font Sizes
- Header Font Size – Table headings
- Row Font Size – Discount rows
Quantity Breaker Labels
- Quantity Label
- Range Label
- Discount Label
Amount Breaker Labels
- Amount Label
- Spend Label
- Discount Label
Tip: Custom labels help align the widget language with your store’s tone.

Step 7: Add Custom CSS (Optional)
For advanced styling needs, you can add custom CSS:
.volume-widget-table {
                                          /* Your custom styles */
                                        }
Warning: Use this option only if you’re familiar with CSS, as it directly affects the widget’s layout and appearance.

Step 8: Save and Apply
- Review the preview to confirm the widget looks as expected.
- Save your changes.
- The customized volume pricing widget will now appear on applicable product pages.
Best Practices
- Maintain high contrast for readability.
- Highlight the active discount tier to guide customer decisions.
- Keep font sizes consistent with your theme for a seamless look.
- Test both quantity and amount previews before saving.